Skins
Skins allow a skeleton's animations to be reused with different sets of attachments. Skins can be used for simple outfits swaps or to assemble entire characters out of many different pieces.

Skins are made up of attachments, bones, and constraints that are only active when the skin is visible. A skeleton can have multiple skins visible at once using the skins view.
The key to skins is the "skin placeholder", which is an attachment that goes under a slot in the tree, like any other attachment. However, it is just a placeholder for the actual attachment that will be used, which comes from the skins that are currently visible.
Animations can show and hide skin placeholders just like they do attachments, by keying the slot attachment. By doing this, animations are not tied to showing and hiding specific attachments. Instead, animations show and hide skin placeholders and which attachments are actually shown comes from which skins are visible, enabling animations to be used with any skins.
See the skin demo, example projects, and tips for usage examples.
Setup
Setting up a skin consists of creating the skin and skin placeholders, then populating the skin placeholders with attachments for that skin. Bones and constraints can also be added to the skin.
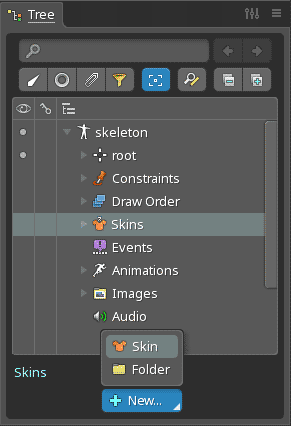
A skin is created by selecting the Skins node in the tree and clicking New... Skin.
Skin placeholders
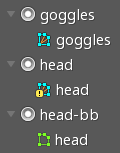
When naming your skin placeholders, the name doesn't need to indicate which skin it is for. Instead, it should be named for the attachment represents.
For example, if you have a red and a blue skin, head would be a good skin placeholder name for the head, not red head or blue head.
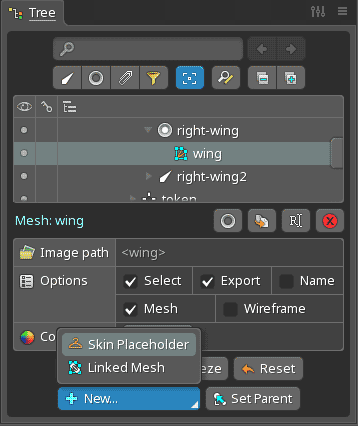
Skin placeholders are created by selecting a bone, slot, or attachment in the tree and clicking New... Skin Placeholder. When an attachment is selected, this option is disabled if the skeleton doesn't have a skin active.
Selected attachments
Multiple attachments can be selected before creating new skin placeholders. A skin placeholder will be created for each one.
If an attachment is selected when creating a new skin placeholder, the attachment will be moved to the active skin under the new skin placeholder. However, first a dialog is shown to provide more options. Some of the options will only appear for mesh attachments or attachments with keys.
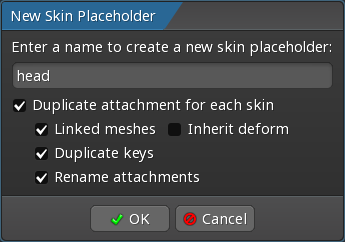
Duplicate attachments for each skin: Duplicates the attachment for every skin. This is useful when adding an attachment that is the same in most or all skins.Linked meshes: Instead of duplicating the meshes, linked meshes are created for the other skins.Inherit deform: The linked meshes will share the deform keys for the source mesh.
Duplicate keys: The keys for each duplicated attachment in each animation are also duplicated.Rename attachments: Prepends the name of the skin to each duplicated attachment. For example,headwill be renamed tored/headfor theredskin. This is useful when the images for each skin are organized into subfolders.
Properties
Export
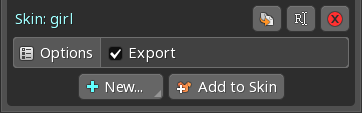
When Export is unchecked, the skin won't be exported, meaning the skin and its attachments won't be in exported JSON or binary and won't appear in image or video exports.
If a mesh attachment is not exported, none of its linked meshes will be exported either.
If an attachment is not exported and is keyed in an animation, the keys won't be exported.
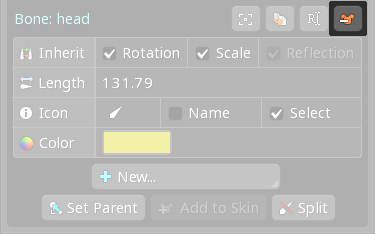
Color
Changing the skin's color can help differentiate skins in the tree to make identification easier. The skin color has no effect at runtime and is only used for visualization in the Spine editor.
Add to Skin
Clicking the Add to Skin button enters add to skin mode, for adding skin bones and skin constraints to the skin. It can be exited at any time by clicking the Add to Skin button again or by pressing spacebar or escape.
Folders
Skins can be organized into folders. To create a folder, select a skin and click New... Folder. Skins can be moved between folders by dragging them.
In exported skeleton data, folder names are prepended to the skin name to create the final name used in the Spine Runtimes. For example, if the folder hair has a subfolder long which has a skin brown, then the skin name at runtime is hair/long/brown.
Active skin
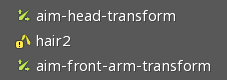
The dot next to each skin in the tree controls which skin is "active".
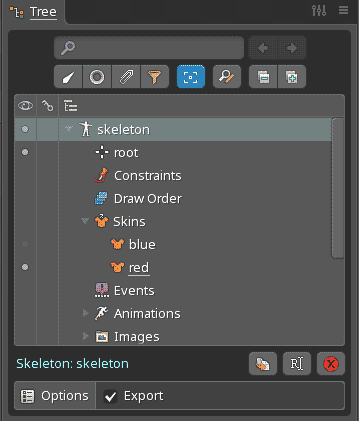
The skin placeholders throughout the tree show attachments for the currently active skin.
The active skin is the one being edited and only one skin may be active at any given time. The active skin is always visible.
The skins view allows many skins to be visible at the same time by pinning them, but only one skin may be active at any given time. Selecting a skin in the skins view makes it the active skin.
Skin attachments
Show all skin attachments can be used to see all the skin attachments for all skins at once.
A skin can have one attachment (or none) for each skin placeholder. To set a skin placeholder's attachment for the active skin, first ensure a skin is active, then drag an attachment to the skin placeholder or use Set Parent. Any previous attachment the active skin had for the skin placeholder is deleted.
If the attachment is dragged to an existing attachment under the skin placeholder instead of to the skin placeholder, then the transform for the existing attachment is copied to the new attachment.
To clear the attachment for a skin placeholder, delete it or drag it elsewhere.
Property rows for skin attachments in the dopesheet and graph may not be visible depending the tree view settings.
Skin bones
Hide skin bones and constraints hides inactive bones in the tree.
Hide viewport skin bones hides inactive bones in the viewport. Unchecking this makes all bones active, regardless of skins, so should usually be checked.
A bone can be added to one or more skins so the bone is active only when a skin it is in is active. This allows a skeleton to have bones that are only used for certain skins. Bones that are not active do not affect runtime performance.
To add a bone to the active skin, select the bone and click on Add to skin in the tree properties. You can also drag the bone in the tree and drop it on a skin. Or, select a skin and click on Add to skin in the tree properties, then click any number of bones or constraints to add them all to the skin.
If the bone is required by attachment weights or constraints that are in other skins, the bone will automatically be added to those other skins. When this occurs, a message is shown with a button to open the spine.log with details about the changes. The changes can be reverted using undo, but doing so will result in warnings.
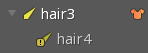
Skin bones have a skin icon to the right of the bone in the tree. Clicking it selects the bone under all its skins. This makes it easy to find the skins or remove the bone from all skins.
To remove a bone from a skin, select the bone under the skin in the tree, then click the remove button (where the delete button is usually found).
Skin bones are not available in Spine Essential.
Bone rows for skin bones in the dopesheet and graph may not be visible depending on the tree view settings.
Skin constraints
Hide skin bones and constraints hides inactive constraints in the tree.
A constraint can be added to one or more skins so the constraint is active only when a skin it is in is active. This allows a skeleton to have constraints that are only used for certain skins. Constraints that are not active do not affect runtime performance.
To add a constraint to the active skin, select the constraint and click on Add to skin in the tree properties. You can also drag the constraint in the tree and drop it on a skin. Or, select a skin and click on Add to skin in the tree properties, then click any number of constraints or bones to add them all to the skin.
Skin constraints have a skin icon to the right of the constraint in the tree. Clicking it selects the constraint under all its skins. This makes it easy to find the skins or remove the constraint from all skins.
To remove a constraint from a skin, select the constraint under the skin in the tree, then click the remove button (where the delete button is usually found).
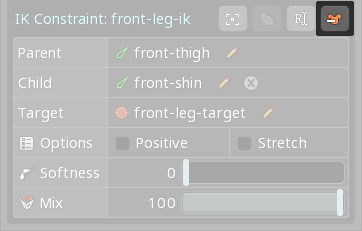
Constrained bones
The constrained bones are the bones that the constraint will modify. When some of the constained bones are not active because they are in skins, the constraint will still work, it just won't modify the inactive bones.
If all the constrained bones are in skins, then the constraint should be in those skins too, because it has nothing to do when the all the constrained bones are not active. The constraint will have a warning until it is added to at least one of those skins.
Skin constraints example
Skins can use constraints to move bones so a skeleton and all its animations can be reused for characters with different proportions. See Skin constraints for different proportions for more information.
Warnings
All warnings should be fixed before exporting data to use with the Spine Runtimes.
Warnings appear in the tree on the icons for bones, attachments, and constraints when skins are misconfigured.
This can happen because various parts of the skeleton depend on other parts. When some parts are added to a skin and that skin is not visible, those parts are not available. This can cause bone transforms to be invalid, prevent attachments from rendering, or prevent constraints from being applied.
Bone warnings
A warning is shown on a bone's tree icon if the bone is not in the same skins as a parent bone. When this occurs, the bone and any attachments will not appear in the viewport.
When a parent bone is not active, the transform for descendant bones is invalid. Anything relying on the child bone's transform, such as attachments using weights, will also be invalid.
To fix bone warnings, add the child bone to the same skins as its parent bones.
When Hide viewport skin bones is unchecked, all bones are made active, regardless of which skins are visible. Bone warnings that will not render correctly at runtime may render correctly when this setting is unchecked.
Attachment warnings
A warning is shown on an attachment's tree icon if:
- the attachment has weights for a bone that has a bone warning, or
- the attachment is in a skin and has weights for a bone that is in a skin, but not in the attachment's skin.
Vertices weighted to a bone that is not active are invalid and are set to world 0,0. For example, invalid vertices for a mesh appear at world 0,0. If all the vertices are invalid, the entire mesh will be at world 0,0 and cannot be seen at all.
To fix attachment warnings, first fix any bone warnings for bones used by the attachment's weights. Then, if the attachment is in a skin and any of those bones are also in a skin, add the skin bones to the attachment's skin.
Constraint warnings
A warning is shown on a constraint's tree icon if:
- the constraint's target bone is in a skin, but the constraint is not in that skin, or
- all of the constraint's constrained bones are in skins, but the constraint is not in any of those skins.
- other physics constraints warnings.
When a constraint has a warning, it means that it either cannot be applied at all, or can only be applied sometimes, depending on which skins are visible.
To fix constraint warnings, add the constraint to the same skins as the target bone. Then, if all of the constrained bones are in skins, ensure the constraint is in at least on of the skins.
Duplicating a skin
When a skin is duplicated, a dialog is shown to provide more options. Some of the options will only appear for mesh attachments or attachments with keys.
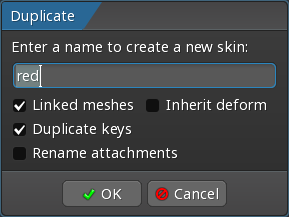
Linked meshes: Instead of duplicating meshes for the new skin, linked meshes are created.Inherit deform: The linked meshes will share the deform keys for the source mesh.
Duplicate keys: The keys for each duplicated attachment in each animation are also duplicated.Rename attachments: Prepends the name of the skin to each duplicated attachment. For example,headwill be renamed tored/headfor theredskin. This is useful when the images for each skin are organized into subfolders.
Skin workflows
Skins are powerful and there are many ways to make use of them. As you work with skins, keep in mind that using the right workflows can save an enormous amount of time.
The first skin
If all your attachments have been created without using skin placeholders, it would be tedious to create skin placeholders and move the existing attachments one by one. To do this more efficiently, first use the tree filter to hide bones and slots, so only attachments are shown. This makes selecting many attachments easier. Next, create a skin or make sure a skin is active, then select your attachments and choose New... Skin Placeholder. This will create a skin placeholder for each attachment using the same name and the attachments are moved under the skin placeholder for the active skin.

If needed, find and replace can be used to fix up the attachment names. For example, to add the skin name as a subfolder prefix, like skinName/imageName.
Similar skins
When a new skin will be similar to an existing skin, it can be helpful to duplicate the existing skin, which also duplicates all its attachments, then modify the new skin.
If dragging images or attachments to the skin placeholders for the new skin, dropping them on an existing attachment will copy its transform, while dropping them on the skin placeholder will not.
Find and replace can be used to quickly rename all the attachments in the new skin. If your images are the same size and use a naming convention (for example skinName/imageName), find and replace may be the only step needed to fully setup a new skin.
Programmatic skins
If you find yourself creating a large number of skins using find and replace, you may benefit from using a different solution. There is no need to tediously create everything in the Spine project if it can derived using a simple pattern or naming convention.
If your skins only differ by the attachment names, work with your programmers to create a runtime solution. One approach is to create only a single skin in the Spine editor. Then, at runtime, code is written that duplicates the skin and changes the names as needed.
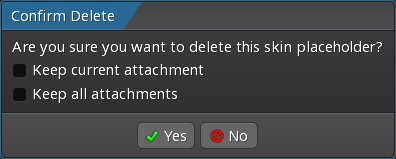
Removing skin placeholders
If skin placeholders are no longer desired, it would be tedious to move the attachment to the slot and delete each skin placeholder. Instead, select the skin placeholders and click delete in the tree properties. On the delete dialog, check Keep current attachment. This will move the attachments for the active skin to the slot before deleting the skin placeholders. Attachments in any other skins are deleted.
Mix and match
Simple projects may use skins so each skin outfits the entire skeleton. More complex projects may use skins to group attachments, where each skin is an individual item or body part, then multiple skins are made visible at once to outfit the skeleton. Our mix-and-match example project uses this approach.
In the Spine editor, the skins view allows multiple skins to be visible at the same time. At runtime, it is done by creating a skin and adding multiple skins to it.
Video