Images
Spine works only with individual image files. If your images are already in a texture atlas, it can be unpacked.
A skeleton can have attachments that reference image files. Spine is not an image editor, so you will need to use your favorite image editing software to create the art for your skeleton. Each part of the skeleton that will move independently needs to be a separate image file.
If your images are on separate layers in Photoshop, Affinity Designer, or another image editor, a lot of time can be saved by importing a PSD or using a script to bring them into Spine in the right positions. Otherwise, each image will need to be positioned manually in Spine.
The first step to setting up a skeleton is to bring in each image as a region attachment, which is a simple, rectangular image that is attached to a bone. However, before region attachments can be created, Spine needs to know where to find the skeleton's image files.
Images path
The Images node in the tree has a path to a folder where Spine will find PNG and JPEG image files for the skeleton. The images path can be relative to where the project file is saved or can be an absolute path. The Browse button can be used to specify a path, or you can type a path and press enter.
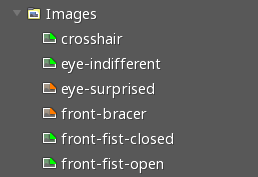
Once the path is set, the image files in that folder appear under the Images node. Spine watches the images folder and immediately loads any changes to the image files.

By default, only the first 2,000 image files found in the image folder are shown. This prevents Spine from scanning millions of files if the wrong path is accidentally specified. Uncheck Limit scanning to allow Spine to find more than 2,000 image files.
Creating region attachments
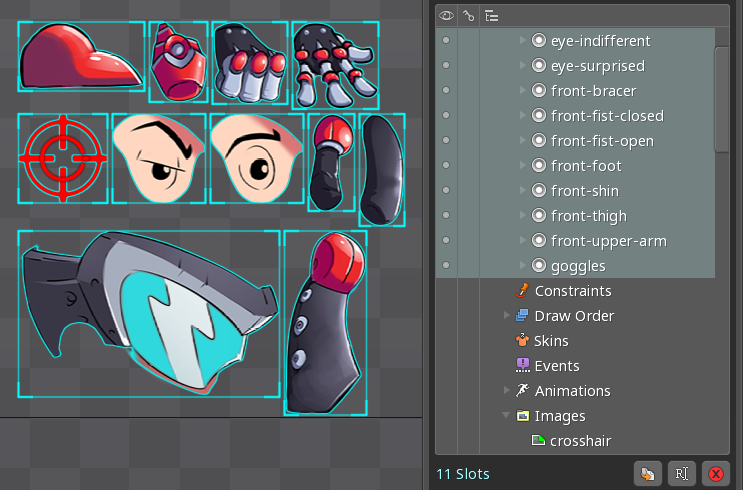
When an image file from under the Images node is dragged into the viewport, Spine will create a slot and a region attachment under the root bone for the image. Multiple images can be selected in the tree using shift or ctrl (cmd on Mac) and dragged into the viewport at the same time.

Images can also be dragged to a bone, slot, or attachment in the tree. If dragged to a bone or slot, the new region attachment is centered on the bone. If dragged to an attachment, the transform of that attachment is applied to the new region attachment.
A region attachment can also be created by pressing P or clicking the Set Parent button in the image's tree properties, then choosing a bone in the viewport or a bone or slot in the tree. When a skeleton has many bones, it is often easiest to choose a bone in the viewport.

Each image file under the Images node has an orange icon if it is not used by any attachment and a green icon if it is used by at least one attachment.

While it's possible to position region attachments manually, it saves a lot of time to use a script to bring them into Spine in the desired positions.
After creating region attachments, the Rotate, Translate, and Scale tools can be used to assemble them into the "setup pose", which is the pose of the skeleton before being animated. Next, the Create tool can be used to create bones and move the attachments to the bones. Using these tools is explained in the next section.
Image file lookup
Spine finds the image file for an attachment by taking the path specified under the Images node and appending the attachment name. The attachment name does not need to include a file extension. Spine will look for files with .png, .jpg, or .jpeg file extensions, though PNG files are most common.
For example, for an images path of ./images/ and an attachment named head, Spine will look for ./images/head.png, ./images/head.jpg, and ./images/head.jpeg. Note that some operating systems are case sensitive.
Attachment names can include subfolders. For example, for an images path of ./images/ and an attachment named red/head, Spine will find ./images/red/head.png.
If an attachment has a Path set, the path is used to find the image file instead of the attachment name. Two attachments under the same slot cannot have the same name, but they can have the same path.
Import PSD
When creating skeleton images using an image editor outside of Spine, the images are usually created on separate layers and oriented correctly for the skeleton's setup pose. It can be tedious to export the images then reposition them individually in Spine. To save time, Spine can import a PSD file saved using Adobe Photoshop or any other graphics software capable of writing a PSD file. See Import PSD for more information.
Scripts
As an alternative to Import PSD, scripts are provided for various image editors to export both images and a JSON data file. This data file can then be imported into Spine to save time when setting up skeletons: just import the data, create the bones, and rigging is complete.
The latest version of the scripts can always be found at spine-scripts on GitHub. Some image editors don't need a script because they have Spine export support built-in, such as Affinity Designer.
Scripts are provided for Adobe Photoshop, Adobe Illustrator, InkScape, GIMP, and Adobe After Effects. Currently the Photoshop script is the most sophisticated and provides the most features, such as tags in layer names to configure bones, slots, and skins.
Video
